
MYLAR BAITFISH
STEP BY STEP
You will need

e-z body by hareline (medium)
small eyes 4mm
Crystal or micro flash
angel hair (red)
saltwater hook
(im using a 1/0 for a 3 inch baitfish)
Clear mono thread
Deercreeks diamond flex

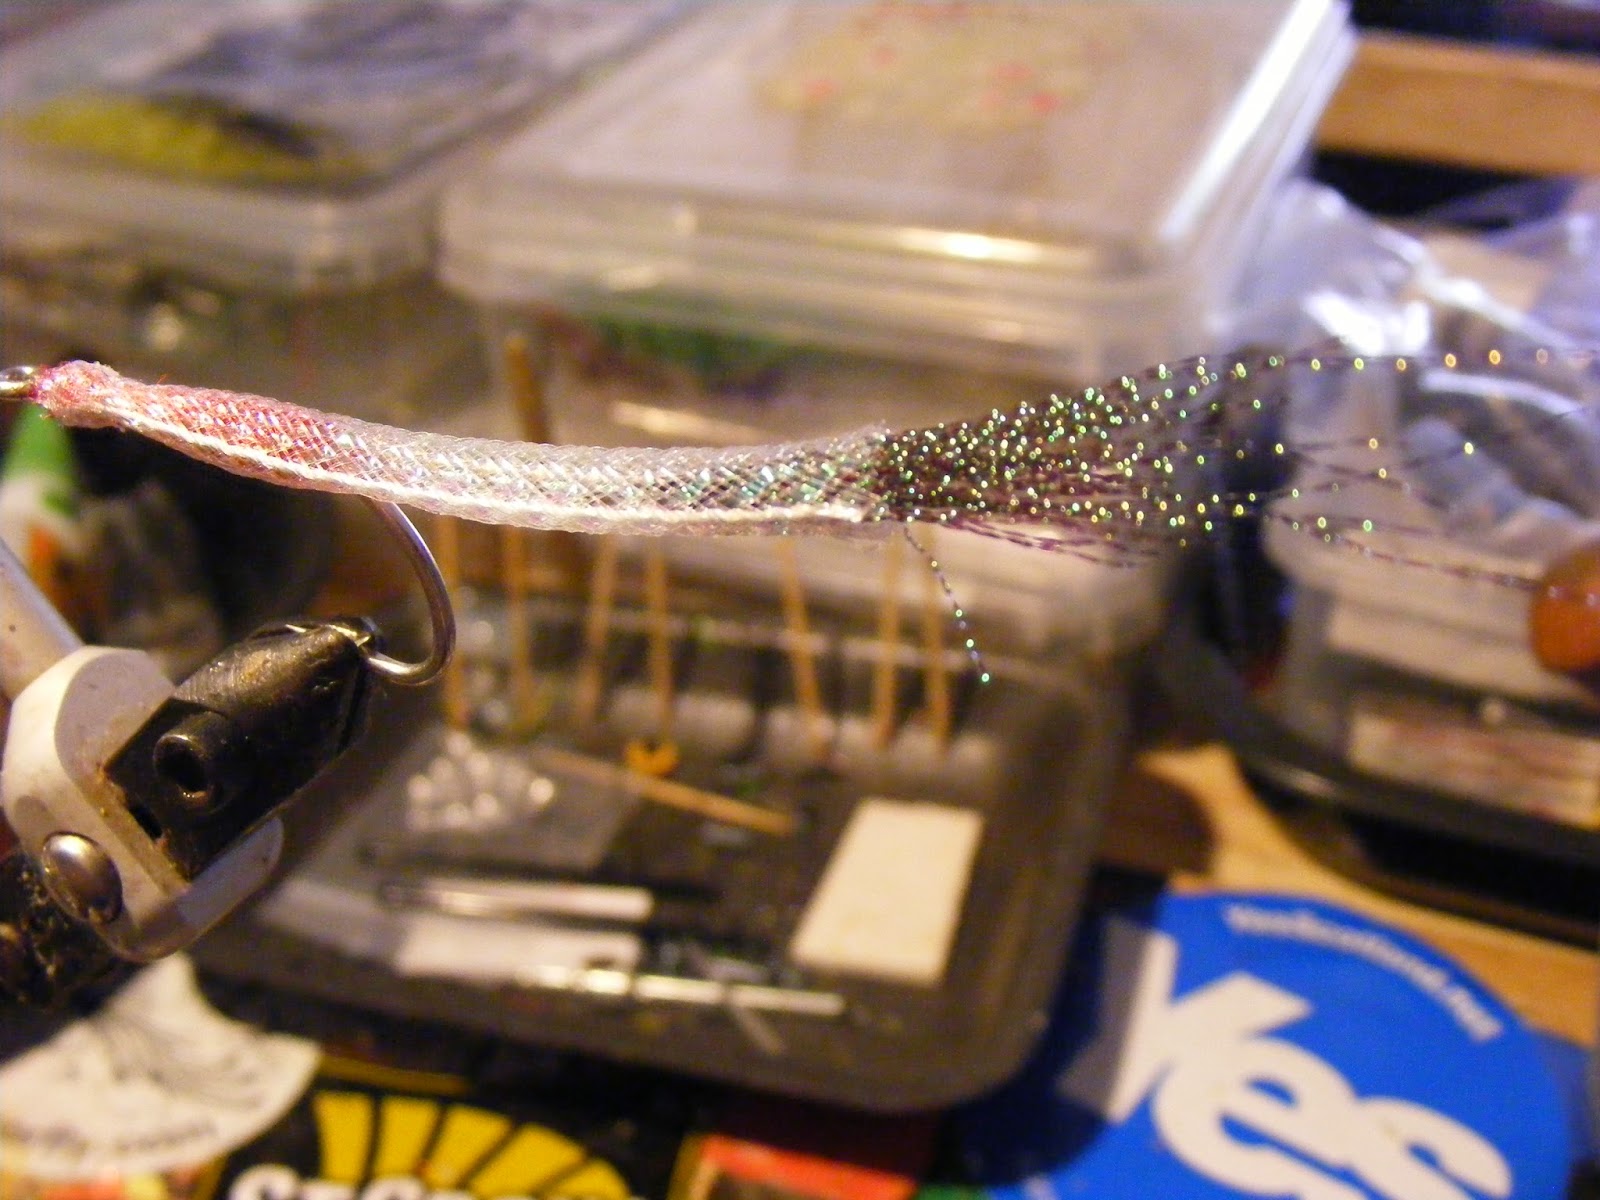
1 – cut a section of tubing to your desired length , im using 3 inchs
on a 1/0 for every hook size up id add an extra inch , when you get to around
3/0 hooks id start using large tubing . and the reverse lower than 1/0 id go
for small tubing , of course you can go very small on these for smaller
predators (think about dead drifting smaller sizes in streams for trout )

2– Thread the hook eye first through the braid (can be
a bit fiddly) , you can leave the white
cotton in the braid as this makes a fine lateral line

3 – heres how you need the hook to sit so the eye is just poking out
the end of braid and the Mylar going back from the where the hook starts to
bend

4 – you should have it looking like this on the hook

5 – pull the braid back to reveal bare hook shank and add a few wraps
of mono

6 – Take a small amount of angel hair in your desired
colour (I think red works really well)

7 – Place on hook shaft and tease round the shank and secure with a few
wraps

8 – Take the forward facing section of angel hair and twist into a rope
with your fingers and wrap evenly around the hookshank

9 – Then secure with a wrap of mono

10 – Next take a bobbin needle and push remaining angel hair into the
tube

11- when its all in it will look like this

12 – Secure with a few wraps of mono till you have formed a head

13 – turn the hook around in the vice , ready for working the tail in

14 – as you can see the cotton core makes a great lateral line

15 – take a small amount of crystal flash

16 – Heat the end with a lighter and roll to stick the ends together,
this makes it easier to place in the tubing
17 – place into the tubing

18 – Add a few wraps of mono to secure and tie off

19 – Trim any uneven flash to form an even tail profile

20 – Turn hook around and we are ready for building the head

21 – Place a small eye on just behind the eye of the hook

22 – add a drop of deercreeks diamond flex uv behind the eye and zap
with a uv pen (if you don’t have uv product you can use either epoxy or super
glue and varnish but this does take a while to build up a good head shape)

23 – Rotate the hook and continue to build up layers

24 – I build up the head by doing the top then the side then the bottom
until you get the right head shape . (if using epoxy coat the head then place
in a rotary drier till dry)

25 – When your happy with the head shape you can then move onto the
tail

26 – Add a small drop of uv to secure the tail in

And boom there you have it; tell me that aint a great little pattern
Mcfluffchucker
(a cave in scotland)


No comments:
Post a Comment